
Anyone who’s spent an evening with an AI image tool knows the loop. You type a prompt and get something 80% right. You tweak the prompt and get something different that’s also 80% right, just wrong in new ways. Forty generations later, the best version was the third one, and you can’t get back to it.
Most real image work doesn’t need a blank canvas, though. Usually you already have something: a product shot, a headshot, a rough concept, an AI image from last week that’s nearly there. The job is to keep what works and fix what doesn’t.
That’s a different skill from prompting from scratch, and the tools have finally caught up with it.


Text-to-image is great when nothing exists yet. Once you have a usable picture, editing it is usually faster and far easier to control.
Say the background’s wrong. Or the portrait needs a different style. Or the marketing team wants room on the left for a headline without the subject shrinking.
A modern AI image editor handles this conversationally. In Pixlio, for instance, you upload the image, describe the change in plain English, pick a model and generate. If the result is close but not quite there, it becomes the input for the next edit. You keep moving forward instead of starting from zero each time.
The underlying models have improved a lot here. Google’s Gemini image model, nicknamed “Nano Banana” when it appeared in 2025, became popular largely because it could keep a face or product consistent across several rounds of edits, which earlier models struggled with. Pixlio lets you pick between several current models, including versions of GPT Image, Nano Banana, Seedream and Qwen Image Edit. That matters more than it sounds, because different models handle different jobs better.
Why one prompt is rarely enough
Even good edits tend to fix one thing and nudge another. The new background looks great, but now the jacket is a slightly different blue. Or the lighting’s better, and a ring has vanished.
The fix is to work in small, focused passes. Handle the background, then the jacket colour, then the ring. Each edit addresses one problem and leaves the rest alone.
There’s a limit, though. Every regeneration can introduce a little drift: textures soften, skin starts to look waxy, small text turns to mush. After five or six passes on the same image, it’s often worth stepping back to an earlier, cleaner version and making the remaining changes from there. Treat the history as a set of save points, not a straight line you must follow.
When you need two images to become one
Some jobs can’t be done by editing a single photo.
The classic example is e-commerce. You have a clean studio shot of a lamp and a lovely photo of a living room, but no picture of the lamp in the living room. Hiring a photographer and a set for each product isn’t realistic.
That’s what an AI image combiner is for. Pixlio’s version takes 2 to 4 source images (up to 8 on higher plans) and offers a few modes. Product in Scene drops a product into a lifestyle setting. Subject into Background moves a person, pet, or object into a new environment. Creative Blend is for artsier work like double exposures, and there’s an Auto mode that picks a strategy for you. You can add written guidance on top, for example, which image supplies the background, where the subject should sit, and how the light should fall.
Your source images still make or break the result. Shots with similar lighting, perspective and camera height combine far more convincingly. Put a product shot from eye level with a frontal flash into a room photographed from above in soft window light, and the AI has to invent a lot of missing logic. It usually shows.
Pixlio’s own documentation is refreshingly honest about one limit: in combined images, logos, text, and exact facial features may shift slightly. It offers a “keep product exact” preset for cases where that matters. If you’re selling the product, it matters.
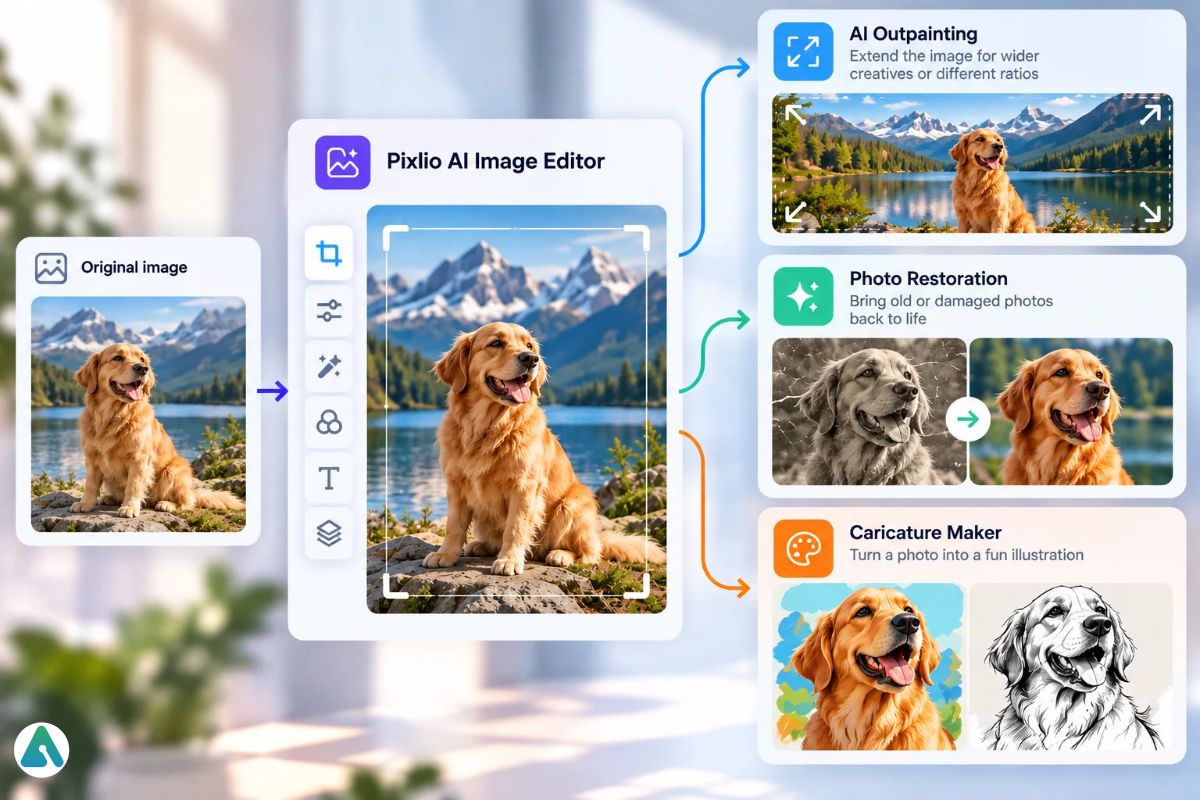

A single prompt box can technically do almost anything. That doesn’t make it the easiest way to do everything.
Focused tools save you from explaining the whole job every time. Outpainting is a good example. It extends a picture beyond its original edges, which turns a square product shot into a wide web banner or a tall Story without cropping the subject. Pixlio has a dedicated tool for that, and a Caricature Maker for the fun end of things: turning a portrait into an illustrated version for an avatar or a gift.
When the interface already knows what kind of change you’re making, there’s less room for the model to misread your intent.
The checklist nobody wants to do (but should)
AI makes visual work faster. It doesn’t make it correct. Before anything goes live, zoom in.
| Image type | What tends to go wrong | What to check |
| Product shots | Warped logos, garbled label text, shifted colours | Compare against the real product, side by side |
| Portraits | Extra fingers, mismatched earrings, odd teeth | Hands, jewellery, hairline, eyes |
| Composites | Missing or contradictory shadows, wrong scale | Where the subject meets the ground |
| Extended images | Repeating patterns, smeared edges | The new areas outpainting added |
Product images carry an extra responsibility. A lifestyle scene around your lamp is fine. A lamp that looks brighter, bigger or better made than the one customers will actually receive is a returns problem waiting to happen, and in many markets an advertising-standards problem too. The same discipline applies to AI-written product descriptions: ground everything in the real product, and check before you publish.
It’s also worth thinking about disclosure. Industry efforts like C2PA Content Credentials can attach a record of how an image was made. Regulators, particularly in the EU, are paying increasing attention to labelling AI-generated and AI-altered images. For routine product mockups that’s rarely a big deal. For anything showing real people or events, be careful.
So what does a good workflow look like?
Less magic than people expect, honestly. Start with the strongest image you’ve got. Make one controlled change. Look at it properly. Keep the good version as a save point. When the next task is a specific one, like extending, combining or stylising, switch to the tool built for it.
That’s roughly how photo retouchers and designers have always worked: small, deliberate passes, constant checking, and a willingness to step back when something’s gone off track. The AI just makes each pass take seconds instead of an afternoon.
Related: How AI Image Generators Speed Up Visual Content Creation in 2026
